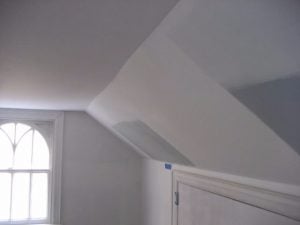
Drywall seams and patches are those areas of the walls that you will want to sand before calling your job done. The areas between two pieces of drywall or areas which were patched will often have large amounts of drywall compound that needs to be removed in order to get a finished look. Taking the time to do it right will save you a great deal of time and frustration when it’s all said and done, and will make sure your DIY project is just as it seems.
If you have already applied the joint compound, then there’s only one thing left to do which is our next addition of  How To’s, and some simple tips from the pros.
Prepping the Area
As always, the first thing to do before any DIY task is to prep not only the immediate area, but any area outside of the work zone which you may find yourself in. Laying plastic, taping doorways, and making sure to remove anything from within the room which you don’t want to get drywall dust on should be your first step. Sanding drywall will produce a great deal of dust, but there are a few simple things you can do to minimize this all-together.
Outside of the immediate area, you will want to make sure the path from the room you’re working in to the rest of the house is also prepped. I can’t tell you how many times I walked from the project room to the kitchen only to realize after the fact what I’ve done. Taking a couple of extra minutes to lay down some old blankets helps reduce any residue which always seems to happen.
Always Consider Safety
Safety should always be your first concern as there are some very simple things you can do to minimize the idea of an unsafe environment. There are some very cheap pieces of equipment that you probably have lying around the house that you can use such as googles, mask, and gloves.
If you’re going to be using a power sander, ear protection is something else to consider as many sanders can cause damage to your ears if they are used for long periods of time. Properly ventilate the room such as opening up a window, but not all. For instance, if you have four windows you only want to open one or two of them as opening them all will cause the sanding dust to circulate.
Choosing Your Sander Preference
When sanding drywall seams and patches there are many types of sanders including both manual and power. Both have their own positives and negatives such as cost, time, dust, and much more that will have to be considered when determining which is best for you.
Manual sanding such as using a sanding block or pole sander is very popular, and is definitely the best option if you won’t have a need for a power sander later down the road. Sanding blocks and pole sanders are relatively cheap and can be picked up for well under $20 at your local hardware store. Sanding blocks are good for sanding drywall seams and patches that are eye level and below while pole sanders are great for those hard to reach areas and along the ceiling.
There are numerous types of random orbit sander that are perfect for sanding drywall seams and patches and can also be used for a wide array of DIY projects. If you already have one then you probably already know the versatility of orbital sanders, and if not, then you soon will.
Read This to Learn How to Sand Drywall Corners
DIY Tips for Sanding Drywall Seams and Patches
Below are some very simple tips to help you sand your drywall seams and patches:
- Start out with a 120 grit sandpaper moving to a finer grit after one or two passes with each.
- Glide the sander over the seams and patches while blending the compound in across all areas
- After you use a pole sander, electric sander, or sanding block, shine a light over the seam or drywall patch. This will show any blemishes that may not otherwise be seen such as waves.
- If blemishes are noted, hand sand using a 150 grit sandpaper being sure to fold the paper which will create an edge
- If hand sanding, be sure to sand in a circular motion
- If pole sanding, use only for the first pass
- If wet sanding, be sure to clean out the sponge frequently and wet. Wet sanding consists of dabbing versus a sanding motion all-together.
Read This for More on Wet Sanding Drywall
Avoid Oversanding
Sand drywall patches and seams can become a very tedious project, but one thing that’s for certain is you don’t want to oversand. It’s very easy to think that sanding hard is the best way to go, but this is far from the truth when sanding drywall. When starting out, sand lightly being sure to use a finer grit of sandpaper then when sanding wood. Using a 120 grit sandpaper is better suited while only making one or two passes with each grit.


